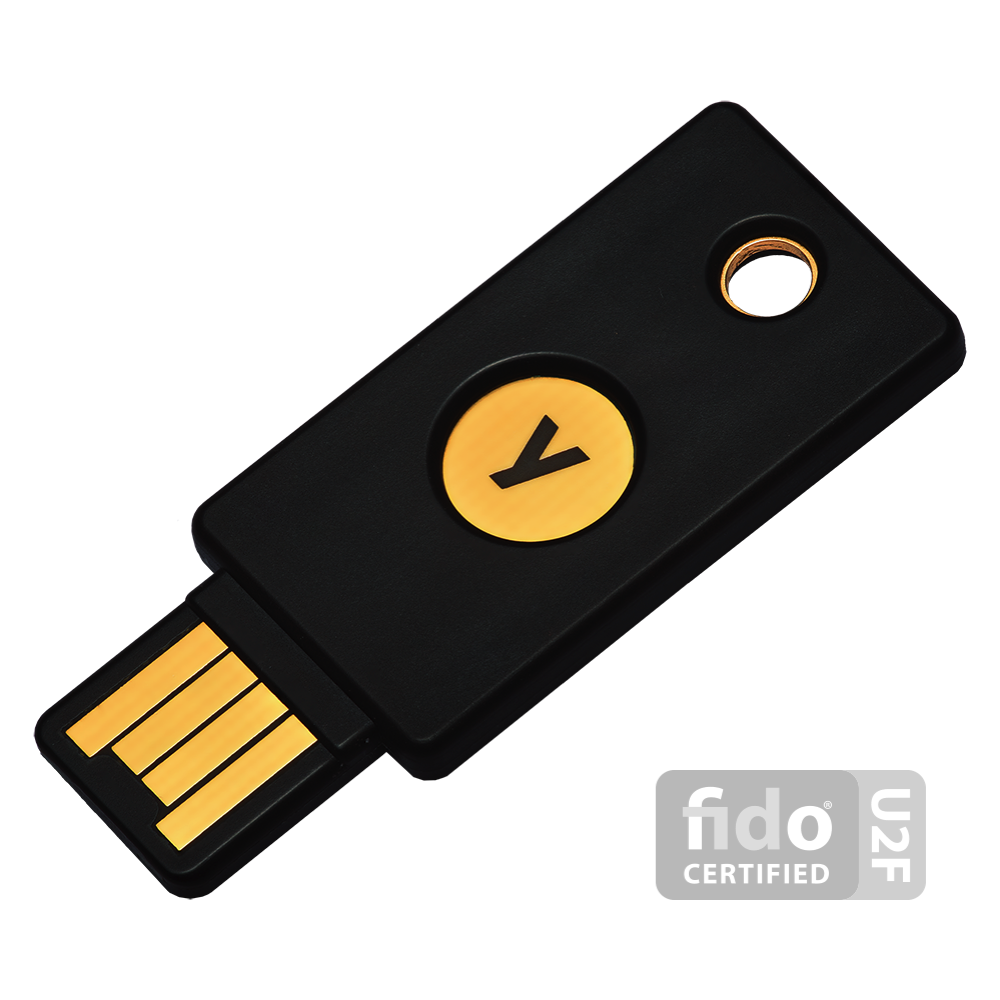
After my recent presentation at MacADUK, I took the opportunity to order myself a Yubikey 4 after getting a glowing recommendation from Joel ‘mactroll’ Rennich himself. I thought it would be handy to explore in more detail the CryptoTokenKit side of macOS smartcards as it supports the US PIV standard, which macOS Sierra supports natively. Getting this to work was pretty well documented by Yubico but I found a couple things that would trip up a lot of people so I’ve written this to help avoid the time I wasted going through it all.
Prerequisites
First things you’re going to require before starting:
YubiKey PIV Manager application
Mac OS X Logon (Yubico-PAM) toolset
YubiKey Personalization Tool (Not linked as this is a Mac App Store only application)
Install all of these before proceeding. On my mac, it took longer to download than to install.
Configure YubiKey PIV
Open up the YubiKey PIV Manager application, then plug in your YubiKey into a free USB port. Assuming you have a brand new key, you’ll be prompted by the application to set a new PIN. Follow the instructions and set a 6-8 digit PIN number. Please don’t use letters or other characters because unlike some smart card variants YubiKey doesn’t seem to like them.
Leave all the other options in the application alone. When prompted, remove and re-insert the YubiKey to begin the pairing process which is now taken care of by macOS Sierra. Click Pair then enter your macOS username and password. Now enter the PIN number you set for the YubiKey and then enter your macOS password again for the login keychain prompt.
Configuring YubiKey Personalization Tool
Assuming the YubiKey has been left plugged into your Mac, load the Personalization Tool. Click the Challenge-Response tab, then click HMAC-SHA1. Select Configuration Slot 2. Tick the Require user input (button press) tick box. If you’ve not already done so, also click Generate next to the Secret Key section. Click Write Configuration to write the change to your key.
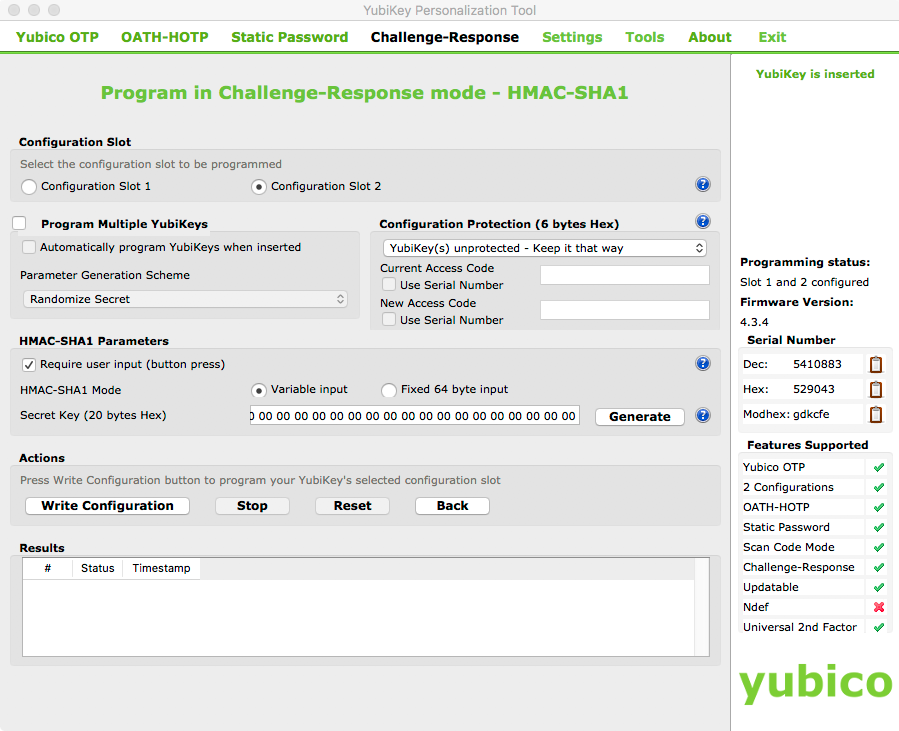
If we don’t turn that option on, the next section fails with a pretty cryptic error message. I would rather you all didn’t go through that headache.
YubiCo has a pretty comprehensive guide on setting this up. Find it linked here and i’ll be honest, a lot of this information here came from that document.
Configuring YubiKey PAM
Currently you will be able to plug in your YubiKey into your mac and have the loginwindow do the usual smartcard change from password to PIN. However you can still use the account password to log into the computer as normal. If you’re interested in hardening the Mac, you’ll want to proceed with this section.
MAKE SURE YOU HAVE A BACKUP OF YOUR MAC. MISTAKES HERE COULD RENDER YOUR MAC USELESS.
Just saying 😉
Open up a Terminal instance as the user you previously paired the YubiKey to. Type the following command:
mkdir -m0700 -p ~/.yubico
YubiKey still inserted into the Mac? Good. Proceed by typing the following command, then immediately touching the YubiKey when it flashes. You’ll have 2 seconds to do this or this will fail and you’ll have to try again.
ykpamcfg -2
If everything went according to plan, you’ll get a message saying that it has stored initial challenge and expected response in the folder you just created. Any error messages at this point are a bad sign, and you should recheck the previous steps in this post.
All good so far? Good, because here’s the really dangerous part. Terminal window still open? Also good, as we now have to edit two pam.d configuration files. One for the loginwindow and another for the screensaver. Let’s start with the following:
sudo vi /etc/pam.d/authorization
Press I to enter insert mode. Insert a new line above the “account” line and add the following:
auth required /usr/local/lib/security/pam_yubico.so mode=challenge-response
It should look like this when you’re done.
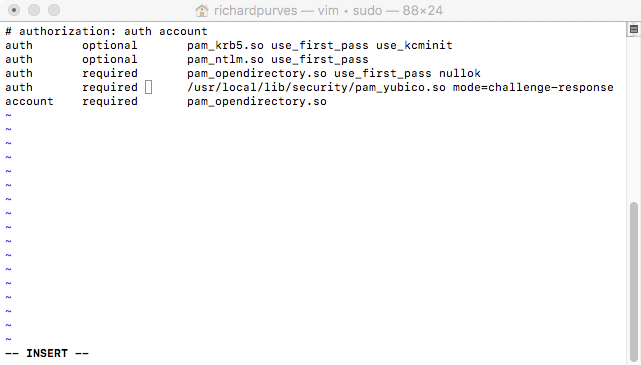
Press escape to quit insert mode: Type :wq then enter to save the file. That’s now locked the loginwindow so it will ONLY authenticate via the PIN from the YubiKey.
Try your password. Doesn’t work anymore. That’s why I insisted on a backup earlier. Plug in your YubiKey and use the PIN number you set up earlier. Works? Good!
We’ll cover the implications for FileVault later, but now we must deal with the screensaver. Type the following:
sudo vi /etc/pam.d/screensaver
Press I to enter insert mode. Insert a new line above the first “account” line and add the following:
auth required /usr/local/lib/security/pam_yubico.so mode=challenge-response
Again, it should look like this when you’re done.
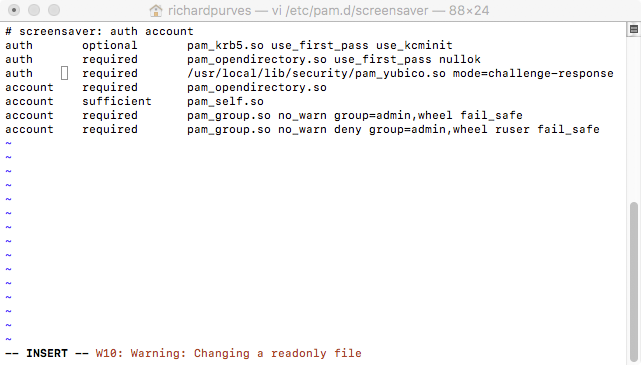
That locks out the screensaver authentication window too.
The FileVault 2 issue
Let’s deal with FileVault 2. This one’s easy, we simply turn off FV2 login passthrough and that’s achieved with the following command:
defaults write /Library/Preferences/com.apple.loginwindow DisableFDEAutoLogin -bool YES
This will allow you to use your usual account password for FileVault and then the YubiKey to login after boot.
Further OS hardening
There’s a couple other options we can set to further improve OS security, and these can be found in System Preferences, in the Security & Privacy pane.
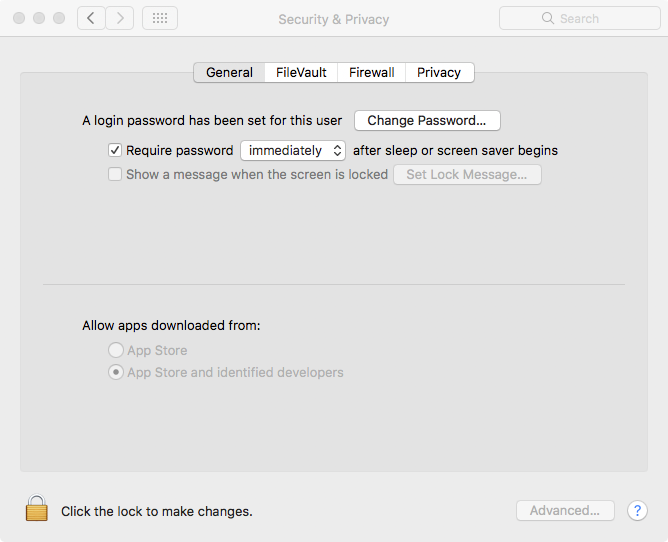
First is to set Require password immediately so that you are always prompted to authenticate from the screensaver or from sleep. The second setting is found by clicking the padlock, then the Advanced button and it’s the tickbox marked Turn on screen saver when login token is removed. This is shown below.

It’s worth noting this option only appears after a smart card device has been paired to a macOS user. The combination of those two settings will cause your Mac to automatically lock and immediately require the password (and only from the YubiKey!) before letting you back in.
Final Words
That neatly locks your Mac to only allow authentication from the PIN on your YubiKey for login and screensaver. A lot of this stuff is provided for information, and at some point I’ll probably think of a script or two to automate most of this. However this should be enough to get you all going for now.
Oh and don’t forget to backup your system before starting!
